Tiling the Downstairs
(June, 2009)
We hate the downstairs carpet. It was newish when I bought the house years ago, but kids and cats and general wear and tear have done a real number on it. So we decided that I should take a couple weeks of vacation, rip out the carpet, and put in some nice tile.
We hit the tile store, and saw some nice porcelain tile for something like $1.69/sq ft, then hit Home Despot and saw some other stuff that was nice for even cheaper. Then at Lowes, we see this really nice tile for $0.88/sq ft on clearance. They had enough in stock for our purposes (1200 sq feet), so we went ahead and got it. But the tile looked familiar to me, so when we got home, I dug around in the garage. It turned out to be the same tile we used in the upstairs bathroom remodel.
The tile was delivered a couple days later. Two full pallet loads. The $55 delivery charge was well worth it just to have the guy use a forklift to unload it.
I figured it'd take two or three days to do the den, and another two or three days for the front room, leaving me with a few days to kick back and enjoy my vacation. Boy, do my estimating skills suck. But we didn't discover that until later.
The plan was to move all the furniture from the den into the front room, do the den, move all the furniture from the front room to the den, then do the front room. We also got enough to do the kitchen when we finally get around to that, but at the moment it's staying with the icky linoleum. After purchasing the tile, we started ripping up carpet.
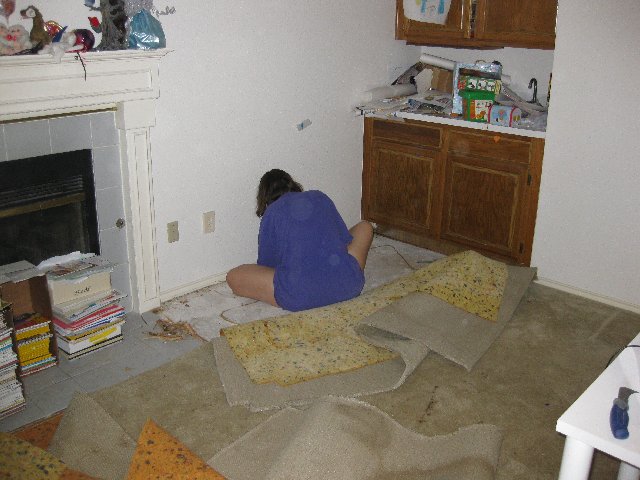
Here's Wendy pulling up the carpet tacking strip. See that tile in front of and around the fireplace? We were kicking around the idea of leaving that there, even though it limited our selection of tile colors. Then one of the edge tiles got whacked and broken while removing the tacking strip. So I got my handy chisel and removed it.
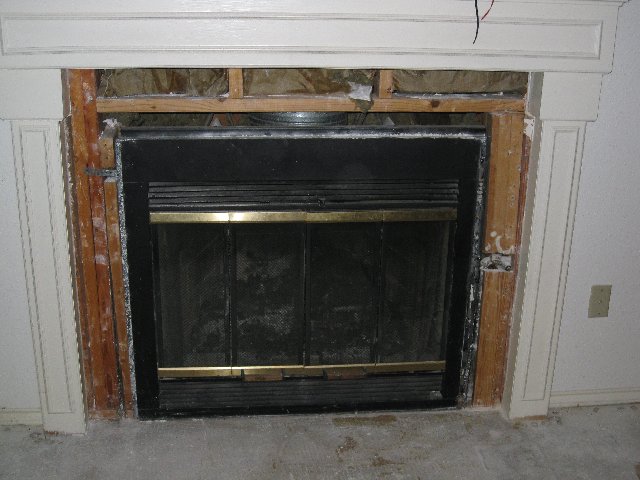
The problem is that when I removed the tile surround, the drywall came with it. Oh well.
Good thing I had some spare drywall in the garage. We'll leave it like this for now, and not worry about it until the floor is done.
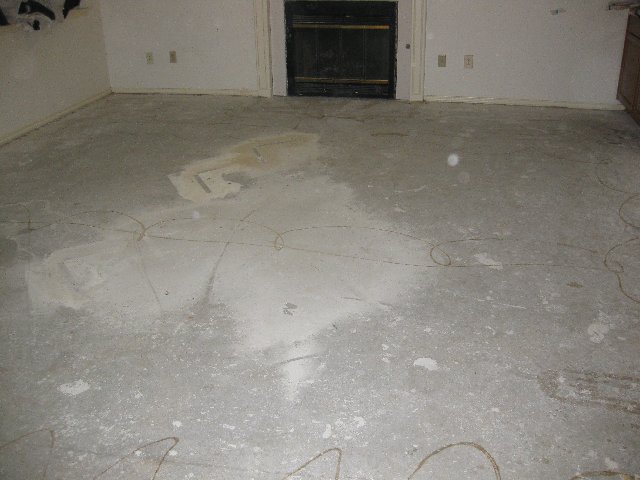
Carpet gone! Nice-looking floor, isn't it? If your house was built carpeted, it looks like this too. One of the flooring options we tossed around was painting the concrete, but the floor prep for that would have been a real bitch.

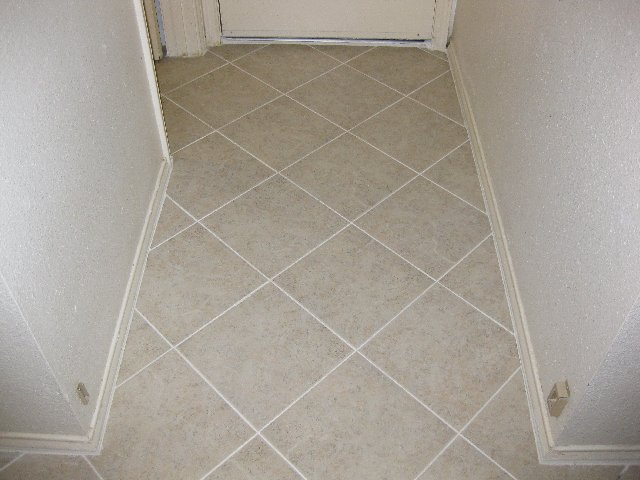
This short hallway leads to the garage and the downstairs bathroom. It had tile in it, but since it was so easy taking out the tile in front of the fireplace, I decided to remove it too. That led logically to...

Ripping up the linoleum in the downstairs bathroom. Which meant I had to remove the sink and toilet that I had installed just a few short years ago. Oh well.

Floor is ready, tile has been delivered, let's get to work. First, find a centerline on that fireplace... WITH LASERS! Because lasers make everything cooler.

I see England, I see France, I see someone's underpants! I really did start at the centerline, but moved over a bit into the corner.

I think this was the third day. My original estimate was to have had this room done by this point. That's how badly my estimating skills suck. I started being tactical at this point and headed for the bathroom to get that finished first, then did the rest of the floor out here.

"Let me in! I want to pee on that new floor before you've grouted it!" She spent a week out on the back porch.

And here's the back room, all done! Looks pretty good, I think. You can still see a little bit of grout haze.
The hallway to the garage.

And the bathroom, all reassembled.
Total time? Pretty much the entire two weeks for just that one room. I have discovered that one person can barely set about one 50-pound bag of mortar's worth of tile in a day. That's about 80 square feet, and is pushing it time-wise - the mortar's starting to get a little stiff by then. And don't do more than 10 pounds of grout at a time - 5 pounds would be even better, for the same reason.
Now for the front room, which will take at least a couple months of weekends...